Showing posts with label Christmas. Show all posts

Monday, January 13, 2014

Organize the Christmas Decorations and Prepare for Next Year


I spent this weekend taking down all of the Christmas décor. Some reason it took me the span of two days to pack it all away, yet a month ago I was able to get everything up and in place within 4 hours. I think it might of been just because it was way more fun to decorate!

Every year, when I spruce up our house for  the holidays, I seem to leave more and more items in the boxes. And every year I say I am going to get rid of those things I no longer use. Then that time in early January comes around, and I want to hurry up and finish with the task, so I just throw it all back in the boxes just to be done with it. Well this year it was time to break the cycle.

The big reason for my motivation was my current storage system was not working. Ok, actually, I'll be honest, it had started to smell like old newspaper, because well it was old newspaper. After our first Christmas as a married couple, I wrapped all of the ornaments into newspaper and put them into cardboard boxes, and that same newspaper was still being used to this day.


On one hand it was a bit of a time capsule to see what was in the news on that day. Do you notice that I must of packed all of the Christmas things away while it was still December?! And look at me this year, all proud of myself that the house is back to normal by mid-January. Of course that was before the kids, when I was well rested and had oodles of time.

My first trip was to the Container Store for an ornament organizer.


I then transferred all of the things we no longer use into a pile to donate. Everything left over like the lights, stockings, garland, etc. went into plastic bins.


Last, I turned my attention to the Christmas cards we received from family and friends.


Now first let me say, I love getting these cards in the mail every year. We have moved a few times over the years, so this is one of the ways we keep in touch with those we no longer live near. It is just great to see how kids have grown or find out what people are up to.  But we have enjoyed looking at the Christmas cards for over a month now, and it was time to take them down. I knew just what to do with them. When my mother sent us her gifts, I commented on the beautiful gift tags on the presents. She told me that they were all made from Christmas cards she had received the year before.


After a few snips on our cards, I have my own tags for our future holiday gifts. I am already brain storming creative ways to use them.


When did you pack away your Christmas decorations? Do you have a way to keep everything organized?


Wednesday, December 25, 2013

Tuesday, December 24, 2013

Have a Dorothy Draper Christmas

dorothy-draper-holiday-cards.jpg

There are designers both past and present that I would love to emulate their style.  Sure you could imagine what pillows they might pick out, or how they might angle a chair...But what a unique twist it would be to imagine how a designer, using their signature style, would decorate for the Christmas holiday.

Dorothy Draper is one of my favorite decorators of all times (learn more here). So I was thrilled when I came across this post on one of my favorite blogs the Glam Pad. The Draper style is reimagined for a festive holiday décor. I think it is spot on.

dorothy-draper-mantel.jpg
 
dorothy-draper-christmas.jpg

Be sure to check out more at the Glam Pad here.

I think some black and white stripes and wallpaper wrapped presents would be a great improvement for next year's Christmas decorating.

What designer style would you like to reimagine for Christmas?

Wednesday, December 18, 2013

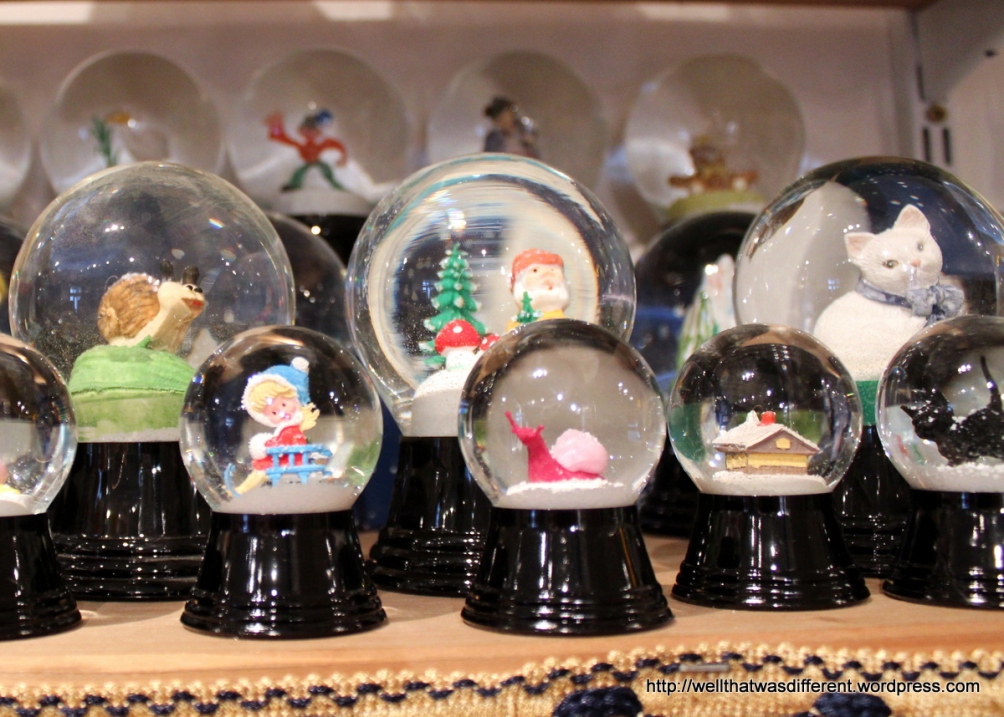
Shake up a Snow Globe


This snow globe has decorated our bookshelf for many Decembers. It is one of my favorite things to display at Christmas time. When we lived in the deep south for several years (and the weather never got below 50) this was the only snow I saw!

There is something about snow globes that attracts people, and not only for Christmas decorations

Pretty Christmas globes.

You'll find them as a give away at sports games with the team logo inside or with a Halloween theme, complete with little black bats floating around. I was once gifted one with my picture in it.

They have been central characters in movies from "Citizen Kane" to the more recent "Coraline".


Fun Fact: Snow Globes were one of the most confiscated item at the O'Hare airport over Thanksgiving weekend. Apparently all of those souvenirs with the Chicago skyline and the dolphins from the Shedd Aquarium were over the liquid limit to take on a plane in a carry on.


No one knows for sure where snow globes originated. The first documented one was shown at the 1889 Paris Exhibition, complete with Eiffel Tower. In Vienna, there is a museum showcasing the work of Edwin Perzy who in 1900 tried to find a way to project light with a globe of water and rice powder. When that didn't work, he instead turned his invention into a business that sold schneekugeln, literally ”snow balls” .

You name it, they will put it in a snow globe for you.
 
Pastry snow globes.
 
Teen-weeny snow globes.
 

Do you have a favorite snow globe?

Wednesday, December 11, 2013

Tidy the Wrapping Paper

Yesterday, I finished wrapping up all my gifts and sent them off to out of town family. It was nice to have that tasked checked off my list.

But I was left with a pile of unorganized wrapping paper.


I knew if I put them back into the depths of my closet, that when I pulled them out next year, I would have a wrinkled paper mess.

So a grabbed a few toilet paper rolls (I always save them to use for the kids craft projects.)


I spent about 1 min quickly sketching festive designs with a black marker so...well...they wouldn't look like toilet paper rolls.

I slipped the rolls over the wrapping paper.


Instantly tidy and neat!


Linking up with Hi Sugarplum, Michaela Noelle Designs, Remodelaholic

Tuesday, December 10, 2013

Decorate with Napkins

I gave a little peak at this project in yesterday's post about my Christmas décor. Here is the promised tutorial.

It is funny how you go into a store with one thing in mind, and come out with something even better.

I originally wanted a plaid runner for my dinning room table, but when I went to Home Goods I couldn't find one that I liked. I didn't have time to go to another store, so I picked up some napkins that had the pattern I had in mind, and thought I would just figure out how to incorporate them into my Christmas décor once I got home.

I played around with them for a while. For a second I thought I would use them as placemats, but that didn't fully work. Then I got the idea to branch out from the table, and decorate the chairs instead.

First I folded the napkins like this.


Then I draped them over the back of the chair.


I gathered the sides together and tied them together with black embroidery thread.


It still needed something, so I dived back into the box of ornaments I bought at Ikea.

 
The gift box ornaments were the perfect addition. 
 
 
I am so happy with the finished look. It makes me actually glad that my original plan didn't work out!
 
Does that ever happen to you?


Monday, December 9, 2013

Decorate with a Christmas Wreath...Horizontal

I really hate to mix holidays. But with Thanksgiving later than usual, I was really itching to get my Christmas decorations up. So I found myself a few days before Thanksgiving with a temporarily empty house (my husband and kids had already started the journey to visit family, while I was going to catch up the next day after I finished up at work.), and the need to get at least some kind of Christmas décor up in my house. After all, no one else would see it until after Thanksgiving was over, and I thought it would be a nice surprise to put us in the holiday mood once we returned.

After inspiration from this tutorial, I was ready.

I stumbled upon these great ornaments at Ikea. I mainly bought the box for the red and white striped ornaments, and figured I would incorporate the rest in some way later. I also picked up a string of red beads while I was there.


Then it was off to Michael's to pick up two wreaths. 

I also made a trip to Home Goods hoping to find a plaid runner for the dining room table. I wanted something that was more red and black instead of what was at the store, red and green plaid. I ended up finding napkins that matched the colors I wanted, but wasn't exactly sure yet how I would use them in my décor.

So I brought home all of my loot, and got to work.

First, I started with the centerpiece of the design, the wreaths. I flipped over one of the wreaths and tied a length of the string of red beads to the frame. I then tied the other end to the opposite side of the wreath. This was repeated with another length of string, on the opposite side of the wreath, so the when finished the "four corners" of the wreath were tied with the string of red beads.


I then placed the second wreath on top. It needed a little fluffing of the branches on the wreath to lay together. After a little bit of work it still was not looking right, so I grabbed some ribbon that happened to be nearby, and tied the two wreaths together in a few places. If your wreaths behave themselves, you might not have to do this.


Next up was hanging the wreath...horizontal. I luckily was able to just loop the two length of the string of red beads over the top of the light fixture. But a removable hook like the kind sold by 3M could also be used.

I added the red and white ornaments, and the green and red ones also in the package, to the wreaths.


After some experimenting, I decided to decorate the chairs with the napkins and add the gift box ornaments. (I will have a tutorial on that tomorrow, so be sure to check back.)


And last Sunday, when we got back from our long journey home, my kids were really excited to see the house in a festive mood already.


Overall, I thought this was a great improvement to our holiday décor. Now on to finish the rest of the house.

Also, for more Christmas décor ideas check out Jennifer Rizzo's blog here.

Jennifer Rizzo's holiday housewalk link party. Link up your home for a chance to be in next years house walk.

Linking Up with Not Just a Housewife, Savvy Southern Style, Hi Sugarplum, Michaela Noelle Designs, Remodelaholic, Evolution of Style


Monday, December 2, 2013

Have a Blue and White Christmas


I love the idea of decorating in blue and white. It captures the wintery look of the season. It is also a chance to be creative with ornaments.
 
 I mean you could do this...
 my blue and white tree
But putting ornaments on a tree is so...normal.

Since you are already stepping out of the box by using a non traditional color scheme, highlight the beautiful blue and white ornaments in unique ways.

Gather them together as a garland and decorate the mantel.

merry and bright mantel centsational girl
Via  
white
 
 
 Or hang ornaments from the ceiling.
 
blue and white ornaments on a branch decorating a kitchen
 
Pale blue and white snowflake theme, hang ornaments on ribbons from the chandelier.  - Christmas Dining Room Decorating Ideas, Decor for a Holiday Dinner Party
 
 
Displaying the ornaments in pretty containers is always an option.


a blue and white christmas by regina


Of course you could still do a tree...with a twist.


More Tabletop Trees


Blue and white could be a wonderful improvement to your Christmas décor.
 
 
For more decorating ideas, head on over to the Pink Pagoda Blue and White Bash by clicking here.
 

And be sure to check out my Blue and White Pinterest Board here and my Christmas Decorating Board here.

Also linking up with Serenity Now, Inspired by Charm