Sunday, November 15, 2015

One Room Challenge: Fall 2015 ~ Week 6


The big day is finally here. Reveal Day! I always enjoy participating in the ORC, and now have completed five rooms because of this challenge. This time I decorated my master bedroom. I was so happy with how it turn out, and it is so nice to have a completed room. Get ready for alot of pictures...


The roman shades above the window seat look so much better after the addition of a ribbon trim. Unfortunately, the cushion for the seat didn't get completed in time, but it will be here soon. Can't wait to curl up with a book and a cup of tea and gaze out the window while sitting in this cozy spot.


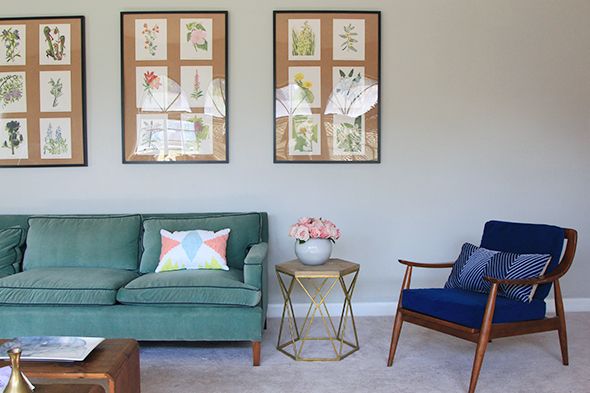
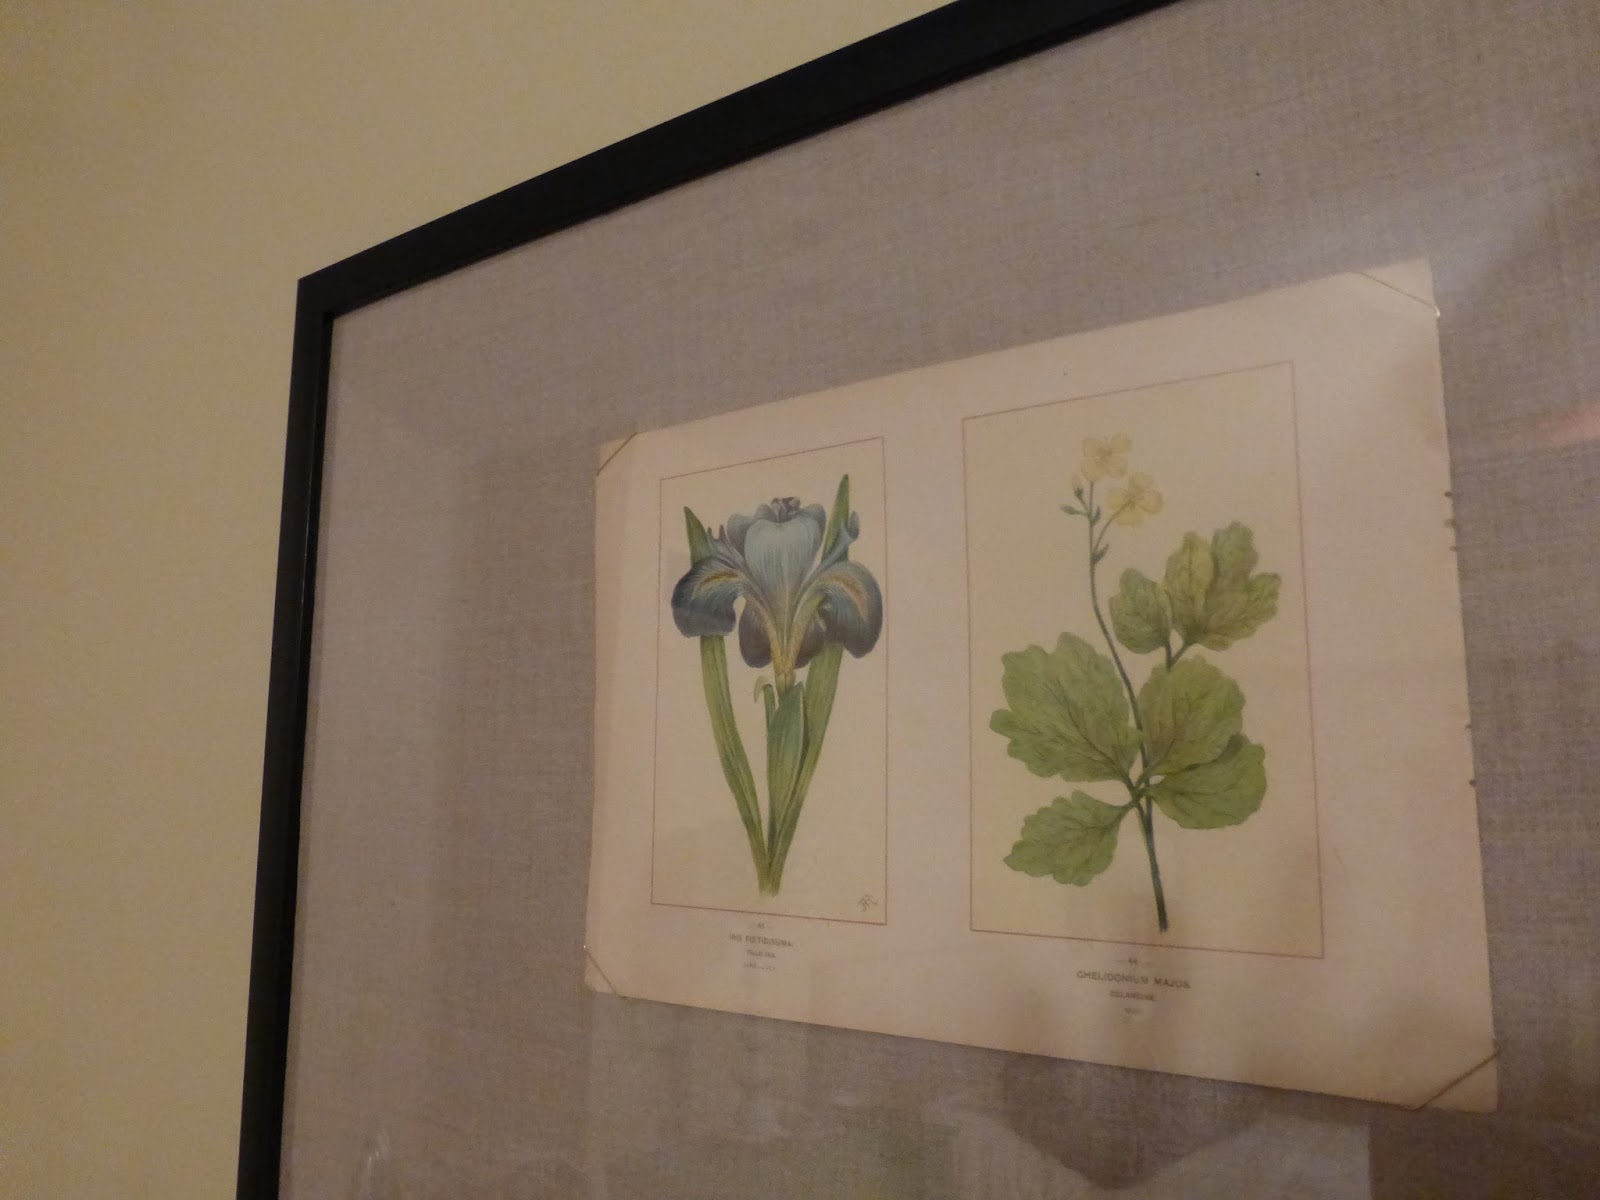
I am so happy with how the art above our dresser turned out.


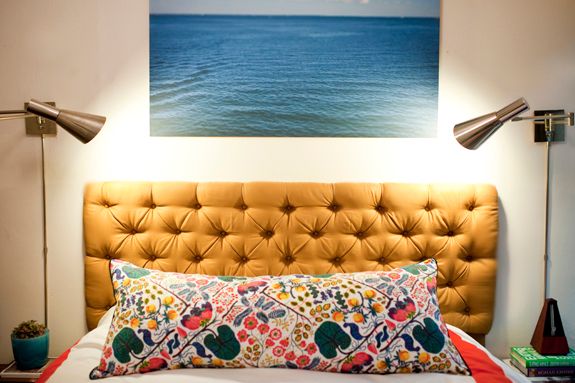
I purchased these book pages from ebay, and I love the flower drawings.  It needed a little something extra, so I took gold paper clips and slipped them onto all four corners of the pages.


After using double sided tape to hold the fabric backing and the pages in place, I used an inexpensive poster frame to complete the look.


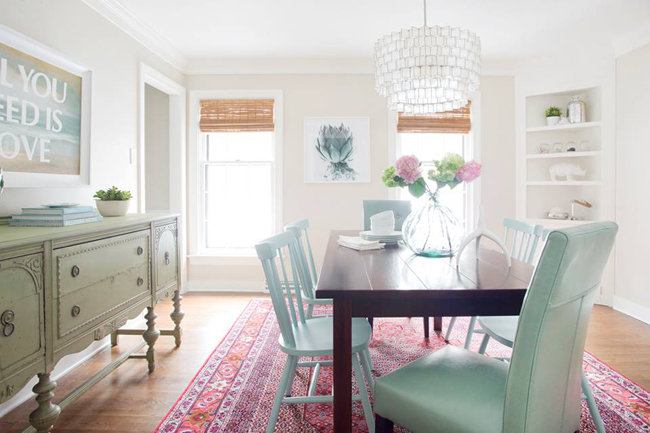
And the best part of the room is the rug. I purchased this rug following my tips to buy a rug on ebay, and was so happy with the way it looked when it arrived. It adds just the right amount of color.


I have wanted a pillow like this for my bed for awhile now, and I finally made one using a curtain I bought years ago. I never ended up using it for my original purchase, but the pattern of the fabric looks perfect in this bedroom.


Be sure to check out the other guest participants in the One Room Challenge.


Sunday, November 8, 2015

One Room Challenge: Fall 2015 ~ Week 5


And we are in the home stretch, Week 5 of the One Room Challenge is here. 
 
I have a few projects I need to finish up, but for the most part, I am almost done with this room. Normally, I am in panic mode right about this time. In a way, though this has been one of the calmest rooms, I have done. I think the secret was I started out with a good plan and I haven't really wavered from it.
 
I can't wait for the big reveal next week, but in the meantime, here are a few sneak peeks.


Be sure to stop back next week to see the finished room.
 
Check out the other One Room Challenge Guest Participants over at Calling It Home.


Sunday, November 1, 2015

One Room Challenge: Fall 2015 ~ Week 4


Week Four is here! I really feel like I need to put a Under Construction sign on my bedroom door. I am gotten bits and pieces done this week in the bedroom, but things are definitely a long way from being complete.

I put ribbon trim on my roman shades. I didn't want to take the shades down off the windows, (because...well...I am lazy) and the glue I tried to use would not hold long enough to adhere in the vertical position. So I did what any child of the 80's would do, especially one who has long time experience adhering ribbon to DIY decorated sweatshirts along with adding some designs drawn with puffy paint and a little blink with the bedazzler. I broke out the glue gun, and it worked like a charm.

I am still trying to decide how I want to put up the botanical pictures I bought.

Should I go the traditional grid pattern ...

My Most Asked-About Accessories: gallery wall grid of botanical prints, inexpensive frames with gold spray paint, custom mats, piano, blue and white lamps, entryway, foyer, stripes:


Maybe hang from a picture rail...

You will love these easy and fun picture hanging tricks from our resident weekend decorator!!:


Or do something different. Now I am liking this idea also...

 photo IMG_0621.jpg


Decisions Decision...Any opinions out there?

There is still some pillows to make and a few extra accessories to add in. I have been lusting after a pillow like this on my bed for years, and I am finally going to make one.


Also, I did decide to get the cover for my window seat made by a professional. Time was the big deciding factor. Can't wait for it to arrive next week!

Good thing I still have two more weeks because there is lots to do...

To check out the other One Room Challenge Guest Participants hop on over the Calling It Home


Saturday, October 24, 2015

One Room Challenge: Fall 2015 ~ Week 3

One Room Challenge Guest Participants, Fall 2015, Week 1
 
 
Welcome back to my ORC. You can check in to Week 1 and Week 2 to see how far I have come redecorating our bedroom.
 
 
This week was spent shopping. Always a fun thing. My big focus was looking for a rug.  I thought a vintage Persian or Kilm rug would be just the thing to add movement and color to the room. I love how these type of rugs look in a space.
 
AStoriedStyle.com


LovableLivableHome-DiningRoom


So I turned to my trusty source, Ebay. Finally after about a week of obsessively looking at the listings, and losing out on one rug that I really wanted, I finally got the perfect rug for the room.
 
 
These are my tips to find a vintage rug on Ebay...
 
Avoid using too many keywords in your search. Sellers use all kind of words to describe things. If you get too specific you could miss out on finding an item. I wanted a rug that was mostly blue. I used that keyword at first, but quickly realized that with these types of rugs, there are so many colors, that most sellers were not even putting much of a visual description in their listings.
 
Select categories instead. First I go to the Antiques category and then selected Rugs and Carpets. I could then further narrow it down by picking the category for the size of rug I was looking for. I then reorganized the listings by resetting sort to list the lowest price first...I am looking for a bargain after all.
 
Read the descriptions. Most sellers are fairly detailed and honest when describing the rugs. They will list the condition of the rug and most of the time it's place of origin. Vintage rugs do not come in a standard 5x7, 8x10, etc. so look at the description for exact measurements, or ask the seller if they are not listed.
 
Look at pictures carefully, but don't completely trust them. I did study the pictures to see what condition the rug was in and to see if I could live with the kind of damage they had. (I was looking at vintage, so I expected the rug to have had a life with a few bruises along the way.) I did realize though that the color was probably not exactly true to life, since that can be easily enhanced. I was right when my bright blue rug from the ebay listing arrived looking a much darker navy...which was what I was hoping and was very happy with.
 
Look early and look often. New listings are added frequently. After a few days of looking, I did start setting the sort to list the most recent listings first. It helped me save time.


After following these tips, the rug I found looks great in the bedroom. So excited to show it to you all during the final reveal...just a few weeks away.


Check out the progress of the other One Room Challenge Guest Participants by going to Calling It Home. 

Thursday, October 15, 2015

One Room Challenge: Fall 2015 ~ Week 2

One Room Challenge Guest Participants, Fall 2015, Week 1
 
 
Welcome back for week 2 of the One Room Challenge. I am joining in with Linda at Calling It Home to make over my master bedroom.
 
I played around with some ideas today, and came up with a plan. Here it is....


Some of the things I already have in the room. I will be keeping the green dressers being used as nightstands and the bed I already have. Also, there is a large wooden dresser I bought at a thrift shop about a year ago. It needs new handles and I am making the decision if I should paint it or leave it as is. Last is the roman shades on the window. Right now they are plain white, but they are just begging for a ribbon trim which can be easily added. Besides for all that, the room is a blank slate.
 
The first thing I need to find is a rug. I am currently scouring Ebay to find an antique Persian rug that will look right in the room, is the right size, and is the right price. Placed at the side of the picture above are some of the rugs I am considering. I need to make a decision soon, or it won't make it here in time.
 
I also wanted to add some nature inspired elements to the room to give it more the feel of the inspiration room I mentioned in week one. I am starting with framed flower prints. I love the image of Emily A Clark's botanical art wall. I am on the hunt for some similar pictures. I am considering framing them and placing them in a grid pattern like she did, or doing something different and hanging the pictures from a rod similar to Jenny's picture rail from Little Green Notebook. Also, I want to do a project with my kids where we create art using sun sensitive paper. I think it will be a meaningful and low cost way to get large artwork on the wall.
 
We also had a window seat built in this room which I am so excited about. I have always wanted one, and I am daydreaming of curling up on it on a lazy afternoon, with sunlight streaming in the window, and a cup of tea and a good book in my hand. But first I need a comfy cushion made with some sort of navy fabric. Of course the big question is do I try to sew it myself (what I have pinned on Pinterest doesn't make it seem to hard) or do I just pay someone. Budget vs time will probably make that decision.
 
There is one thing that will most likely not get finished. I really want the baseboards and doors painted white (currently they are a dark stained wood). Now I hate painting trim as I learned when I did it during the Fall 2014 ORC. For my sanities sake, it is worth it to me to pay a lovely painter to do that. I am not sure if I can get someone here in time to do all the painting, so I am just going to accept now that the room might not be completely done in week six. But it will be much better than it is now...


Thursday, October 8, 2015

One Room Challenge: Fall 2015 ~ Week 1

One Room Challenge Guest Participants, Fall 2015, Week 1
 
 
It's that time again when many of us in blog-land join in with Linda of Calling It Home to take on the challenge of redoing one room in six weeks. I will be popping back in each Thursday with my progress. This is not my first trip to this rodeo (you can see my past ORC rooms by clicking here), but I only decided about 5 minutes ago to throw my hat in the ring again. Our master bedroom needs to get put together, and I know the only way I will stop waffling on what to do and make some decisions is if I have a deadline. The One Room Challenge will definitely give me that.
 
 
I am thinking of keeping the room mostly navy with a touch of green. I was really inspired by this room designed by Lauren Liess.
 
Mistake: The Bowling Alley Effect Long, narrow rooms are the bane of furniture arranging. But there is a way to play up this awkward space to your advantage: divide the room into zones. Arrange the conversation area in one zone and place a desk along the back of the sofa to create a work zone, or place a small table and chairs in the area behind the sofa for homework or playing games.: 
 
 
Achieve fresh style on a budget with these use-anywhere design ideas that are versatile and easy to do.:


I loved the different color combinations, textures and uses of nature inspired fabrics. The room has the same kind of feel I hope to replicate in my bedroom.
 
 
I will be back next week with my plans for the room...


Sunday, October 4, 2015

Keep a Few Things


Yesterday I talked about how I cleaned out my closet. The big thing I couldn't part with were my prom dresses. Are they in style?...probably not. Will I have a time to wear them again?...most likely not. Do I even fit in them?...definitely not. But I just couldn't let them go.

When I look at my dresses I wore all those years ago, so many memories come up. My mother and I would take a whole day going to the fancy dress stores in town. We would both have to agree on a dress...because for me, I would be wearing it, and for her, she was paying for it. After many false starts and a few disagreements, the perfect dress would be found. Of course, then the anticipation of the big day would begin, and the planning among my friends would start. There would be so much talk and fun between me and my friends as we got ready for the big day. Eventually, the night of prom would arrive and each event would be filled with the highs and lows and dramas that only can occur in high school.

It is funny how a little bit of fabric can have so much memories woven into it's seams.

They are only taking up four and three-quarters inches of space (yes I measured). In my head, I know I should let them go, or take a pictures, or donate them to a good cause, or one of the other many things that professional organizers tell you to do. But for now, even though I no longer wear my prom dresses, they will stay in my closet.

Do you have a piece of clothing you just can not ever see yourself getting rid of?

To see the rest of the 31 Days posts, click here.

Friday, October 2, 2015

Clear Out the Closet


So with most of my new projects, I begin with first getting rid of the old. If I was going to edit my clothes down to those that are truly my style, I needed to make room for them in my closet.

And so began the long process of eliminating things. (Yes, I read that book.)

The goal here at the beginning was just to get rid of the clothes that I knew for a fact I was never going to wear or no longer fit. I had to admit I was pretty ruthless. I felt like I had these ladies in the room helping me decide what to keep, and what to throw away.

30554630f7f6d63dd1318a113b548994_main

 
If I waffled on if I should keep an item, I admit I sided towards putting it back on the rack. This will be an evolving process, and I am seeing another closet tidying will probably be necessary once I further define my style. This is only day 2, and we have a ways to go.
 
At the end of this closet clean out, there is a pile of clothes on the floor ready to donate, and space in the closet, so I am going to consider this day a success!


To see the rest of the 31 Days posts, click here.
 

Thursday, October 1, 2015

Find My Style in 31 Days


I am excited to be joining this year's 31 Days. It's a writing challenge where you pick one topic and discuss it each day for the month of October. Thanks for joining with me, as I talk endlessly thoughtfully about one subject.

For those of you who are new to my blog, welcome. In my blog, I always talk about small changes I make in my life. Because while I have a good life, there is always room for improvement. So of course, when I decided that I wanted to be a part of 31 Days I knew my topic needed to be of some benefit to me and my life. I thought a lot about what I wanted to do for the month of October, and finally decided that I should tackle a project I wanted to do for awhile now, and that is better define my fashion style. If I know my style, I envision picking out clothes to be much more efficient, and no matter which clothes in my closet I put on, I would feel happy and put together. I want dressing in the morning to be an easy task. I no longer want to feel like I am just a big cliché since I "never have anything to wear." So I am going to spend this month deciding what I really want in my closet, and what clothes will make me feel my best...and of course writing about it.

We will see what I look like by November...

And I wouldn't be me if I didn't make out a list of things to tackle for each day. (Click on the links below to see each day's post.)

31 Days to Find My Style ~ To-do List:

Pick a topic and get Started

Clear Out the Closet

Keep a Few Things


Saturday, June 20, 2015

Redo a Thrifted Lamp


DIY Summer School over at Beth's blog Design Post Interiors is back in session. Today's theme is Thrifted.
 
I love the idea of this. If I have a spare moment (which admittedly is not often) it is fun to wonder around one of the local thrift shops and see if any thing of interest catches my eye. It is a bit of a treasure hunt. Of course, sometimes you are successful and sometimes you are not. Which is why the hunt continues...
 
Today, I am sharing how I redid two lamps I  found at a garage sale. They were the perfect addition to the two dressers I was using as nightstands in my bedroom. Check out all the details by clicking HERE.
 
 
And head on over to see what others thrifted.


Thursday, June 4, 2015

Love Those Ikea Hacks

Today I am joining Beth of Design POST Interiors for her DIY Summer School. Twice a month this summer she is hosting a link up where other bloggers can share their DIYs. The theme today is IKEA hacks.
 
I love wondering the halls of IKEA (ok more accurately following along with the arrows) and checking out all the model rooms. I always get so much inspiration. And the simple clean lines of the Swedish furniture and other accessories allows for such creativity when it comes to turning them into a hack.
 
Today I am sharing a previous post where I added a little color and some pretty handles to plain Tarva dressers. Check out the post here for all the details.


Via
 

I wanted two dressers, to serve as both a nightstand and storage on either side of the bed in the master bedroom, and these were the perfect fit. With just a little bit of effort, these dressers made a great improvement to the room.
 
Be sure to pop on over to Design Post Interiors and see what IKEA hacks others created.

Tuesday, June 2, 2015

Check Out a Great Blog

fly your penelope flag!


Just wanted to pop in to tell you all about a great blog I am following. 

Penelope Loves Lists is perfect for all those type A, list making, organizing obsessed people out there. It was the first blog I ever started reading, and I am so thrilled that Meredith has recently brought it back.

There will be a whole new look coming soon, but in the meantime check it out when you have a moment. (You might just see someone you recognize.)

Monday, June 1, 2015

Get My Wardrobe Fixed

Thanks so much for all the great feed back on my entry way and powder room that I recently finished for the One Room Challenge. Promise to have tutorials for the rug runner, the art made from maps, and the powder room's fabric wall coverings up soon. I am already eyeing which room I am going to be doing for the next ORC in October. The rate I am going with decision making, it will take me that long to pick what design style I am going with.

In the meantime, I need a new project...so I decided to focus on myself for a change.  Looking at my wardrobe, I realized that I really keep wearing the same thing over and over again. Frankly, I am starting to look a little boring. The problem is I am not good at shopping. I chalk this up to the fact that I have worn some sort of uniform for most of my life. I don't really have the time anymore to just wonder from store to store looking for just the right thing, so I have to limit myself to just one or two places to shop in a tight timeframe. Then I get frustrated if the right thing doesn't jump out at me from the clothing racks, and I feel like I just wasted my time.

Enter Stitch Fix. I had heard about it from a few people. Honestly, I was a little nervous that a personal stylish randomly assigned to me could pick out five items of clothing that would be something I would like and would fit right. But I heard such good things that I thought why not just give it a try. I knew I would only be out the $20 styling fee if I didn't like anything since I could send it all back if I didn't want them. And if I did like something, the styling fee is applied to the purchase price. It was worth that just to see what everyone was talking about. I filled out my profile through the Stich Fix website (will share my tips later on how to accurately represent your fashion tastes) and waited to see what the personal stylish would send me.

I was pleasantly surprised when I got my box in the mail. My stylist totally got my fashion sense.


The first order of business was trying everything on. This was probably the best part since I was in my own home. I could try the items on a few times at my leisure if I was undecided on something, I had my closet right there to see if something that I already owned would go with something that was in my fix, and I didn't have to deal with the weird dressing room lighting at most stores.

And I loved that I was also sent a card, featuring each shirt or pants in my fix, with two different ways to style it. I am not the most fashion forward person, and it was great to now have ideas for how to wear something that I wouldn't have even thought of.


So here where the clothes I received in my fix:


I ended up keeping the navy and green shirt and the blue and coral striped shirt. They looked great on me, and was so glad to add them to my wardrobe rotation. I would have kept the pants, but they were a little more than I wanted to spend right now, and with going into summer I knew I wouldn't be able to wear them for a while. Also, the dress I loved when I pulled it out of the box, but it didn't fit right, unlike everything else which was the perfect size. The one kind of miss was the chevron top. It was just too flowy and thin for me. But I appreciated that it was something out of my comfort zone, that I never would have tried on if I saw it in a store and I might of liked it...maybe.

I did go ahead and sign up for my next Stitch Fix, and can't wait until it gets here. (I decided to request one when I want it, although you can sign up for one to arrive on a set schedule.) I asked for some summer outfits that are causal but still a step up from jeans and a T-shirt. I will let you all know how it goes.  

Have you ever tried a service like this? Am I the only girl who feels they are not good at shopping?


Note: This is not a sponsored post...just wanted to share about something that made an improvement in my life. The post does contain affiliated links since that is what keeps the lights on for the blog. Thanks for the support!


Linking up with:
Tuesday:

Saturday, May 9, 2015

One Room Challenge: Spring 2015 ~ Week Six

 
It's Reveal Day!!!!
 
 
It is week six of the One Room Challenge Linking Event hosted by Linda of Calling It Home. This time I was a little late getting the room done (so it is technically week six and a half), but good things come to those who wait....
 
 
My entry way is finished, but it was definitely a journey getting to this point. The before pictures I showed in week one are now just a distant memory . I showed my plan for how I would style the space in week two, and asked for help solving my dilemma. In week three, I showed the items that would go into the powder room that is right off the entry way. I also talked about the rug I had picked to use as a runner on the stairs...and then changed  my mind in  week four.  Even though I didn't have a lot of pictures to share that week, I did list the things that I thought every entryway should have. Week five, I showed the progress I had made, so far. Which brings us to week six and what the entry way looks like now...


I am so happy to see this room now every time I open my front door.


The stairs are such an improvement to the space. And I am so glad I picked this rug runner. It has great texture and the right amount of pattern to satisfy my design style, but is still neutral enough to not overpower the room.


I added accessories to the table that was already in the room, including a lamp I had for years. I just put on it a new lamp shade, to update it's look. Two X-benches tuck under the table, but can easily be pulled out and used when putting on shoes. I also included a fern to fill in the space between the table and the stairs.


My favorite thing in the room is the art I added to the wall above the table. I love decorating with maps, and luckily found a great website that had beautiful vintage maps ready to be printed. I selected states that had places that meant something to us as a family. Plus, I added a little heart to each state, because I am corny like that.


The powder room is actually not completely finished. I didn't order enough of the fabric to cover the walls, so there are a few spots that are still bare awaiting the shipment to arrive sometime next week. Putting the fabric on the walls is going well so far.  I do love the bold pattern, something I feel you can get away with in a powder room.


The mirror looks great (although it did take some work getting it on the wall since the studs were not lining up with where I wanted to place the mirror. Actually, my husband figured out how to make it work, because he is smart like that.)


I added some brass accessories that I think ties everything together. The powder room now has the same great style of my inspiration picture.


So that is my entry way and powder room. Having this room put together is such an improvement to my home. I loved participating in the One Room Challenge for the fourth time. The tight deadline and motivation from the other participants helped me get another room in my house finished and looking great. (If you would like to see my other ORC rooms, here are the links to my laundry roommud room, and library/living room.) 
 
Be sure to head on over to Calling It Home to see the other linking participant's room reveals.
 
And keep in touch by either subscribing to all my posts by leaving your email in the box in the sidebar, or following all of my Pinterest boards. And feel free to leave a comment and let me know what you like.
 
Until next time....