Showing posts with label bedroom. Show all posts

Sunday, November 15, 2015

One Room Challenge: Fall 2015 ~ Week 6


The big day is finally here. Reveal Day! I always enjoy participating in the ORC, and now have completed five rooms because of this challenge. This time I decorated my master bedroom. I was so happy with how it turn out, and it is so nice to have a completed room. Get ready for alot of pictures...


The roman shades above the window seat look so much better after the addition of a ribbon trim. Unfortunately, the cushion for the seat didn't get completed in time, but it will be here soon. Can't wait to curl up with a book and a cup of tea and gaze out the window while sitting in this cozy spot.


I am so happy with how the art above our dresser turned out.


I purchased these book pages from ebay, and I love the flower drawings.  It needed a little something extra, so I took gold paper clips and slipped them onto all four corners of the pages.


After using double sided tape to hold the fabric backing and the pages in place, I used an inexpensive poster frame to complete the look.


And the best part of the room is the rug. I purchased this rug following my tips to buy a rug on ebay, and was so happy with the way it looked when it arrived. It adds just the right amount of color.


I have wanted a pillow like this for my bed for awhile now, and I finally made one using a curtain I bought years ago. I never ended up using it for my original purchase, but the pattern of the fabric looks perfect in this bedroom.


Be sure to check out the other guest participants in the One Room Challenge.


Sunday, November 8, 2015

One Room Challenge: Fall 2015 ~ Week 5


And we are in the home stretch, Week 5 of the One Room Challenge is here. 
 
I have a few projects I need to finish up, but for the most part, I am almost done with this room. Normally, I am in panic mode right about this time. In a way, though this has been one of the calmest rooms, I have done. I think the secret was I started out with a good plan and I haven't really wavered from it.
 
I can't wait for the big reveal next week, but in the meantime, here are a few sneak peeks.


Be sure to stop back next week to see the finished room.
 
Check out the other One Room Challenge Guest Participants over at Calling It Home.


Sunday, November 1, 2015

One Room Challenge: Fall 2015 ~ Week 4


Week Four is here! I really feel like I need to put a Under Construction sign on my bedroom door. I am gotten bits and pieces done this week in the bedroom, but things are definitely a long way from being complete.

I put ribbon trim on my roman shades. I didn't want to take the shades down off the windows, (because...well...I am lazy) and the glue I tried to use would not hold long enough to adhere in the vertical position. So I did what any child of the 80's would do, especially one who has long time experience adhering ribbon to DIY decorated sweatshirts along with adding some designs drawn with puffy paint and a little blink with the bedazzler. I broke out the glue gun, and it worked like a charm.

I am still trying to decide how I want to put up the botanical pictures I bought.

Should I go the traditional grid pattern ...

My Most Asked-About Accessories: gallery wall grid of botanical prints, inexpensive frames with gold spray paint, custom mats, piano, blue and white lamps, entryway, foyer, stripes:


Maybe hang from a picture rail...

You will love these easy and fun picture hanging tricks from our resident weekend decorator!!:


Or do something different. Now I am liking this idea also...

 photo IMG_0621.jpg


Decisions Decision...Any opinions out there?

There is still some pillows to make and a few extra accessories to add in. I have been lusting after a pillow like this on my bed for years, and I am finally going to make one.


Also, I did decide to get the cover for my window seat made by a professional. Time was the big deciding factor. Can't wait for it to arrive next week!

Good thing I still have two more weeks because there is lots to do...

To check out the other One Room Challenge Guest Participants hop on over the Calling It Home


Thursday, October 15, 2015

One Room Challenge: Fall 2015 ~ Week 2

One Room Challenge Guest Participants, Fall 2015, Week 1
 
 
Welcome back for week 2 of the One Room Challenge. I am joining in with Linda at Calling It Home to make over my master bedroom.
 
I played around with some ideas today, and came up with a plan. Here it is....


Some of the things I already have in the room. I will be keeping the green dressers being used as nightstands and the bed I already have. Also, there is a large wooden dresser I bought at a thrift shop about a year ago. It needs new handles and I am making the decision if I should paint it or leave it as is. Last is the roman shades on the window. Right now they are plain white, but they are just begging for a ribbon trim which can be easily added. Besides for all that, the room is a blank slate.
 
The first thing I need to find is a rug. I am currently scouring Ebay to find an antique Persian rug that will look right in the room, is the right size, and is the right price. Placed at the side of the picture above are some of the rugs I am considering. I need to make a decision soon, or it won't make it here in time.
 
I also wanted to add some nature inspired elements to the room to give it more the feel of the inspiration room I mentioned in week one. I am starting with framed flower prints. I love the image of Emily A Clark's botanical art wall. I am on the hunt for some similar pictures. I am considering framing them and placing them in a grid pattern like she did, or doing something different and hanging the pictures from a rod similar to Jenny's picture rail from Little Green Notebook. Also, I want to do a project with my kids where we create art using sun sensitive paper. I think it will be a meaningful and low cost way to get large artwork on the wall.
 
We also had a window seat built in this room which I am so excited about. I have always wanted one, and I am daydreaming of curling up on it on a lazy afternoon, with sunlight streaming in the window, and a cup of tea and a good book in my hand. But first I need a comfy cushion made with some sort of navy fabric. Of course the big question is do I try to sew it myself (what I have pinned on Pinterest doesn't make it seem to hard) or do I just pay someone. Budget vs time will probably make that decision.
 
There is one thing that will most likely not get finished. I really want the baseboards and doors painted white (currently they are a dark stained wood). Now I hate painting trim as I learned when I did it during the Fall 2014 ORC. For my sanities sake, it is worth it to me to pay a lovely painter to do that. I am not sure if I can get someone here in time to do all the painting, so I am just going to accept now that the room might not be completely done in week six. But it will be much better than it is now...


Thursday, October 8, 2015

One Room Challenge: Fall 2015 ~ Week 1

One Room Challenge Guest Participants, Fall 2015, Week 1
 
 
It's that time again when many of us in blog-land join in with Linda of Calling It Home to take on the challenge of redoing one room in six weeks. I will be popping back in each Thursday with my progress. This is not my first trip to this rodeo (you can see my past ORC rooms by clicking here), but I only decided about 5 minutes ago to throw my hat in the ring again. Our master bedroom needs to get put together, and I know the only way I will stop waffling on what to do and make some decisions is if I have a deadline. The One Room Challenge will definitely give me that.
 
 
I am thinking of keeping the room mostly navy with a touch of green. I was really inspired by this room designed by Lauren Liess.
 
Mistake: The Bowling Alley Effect Long, narrow rooms are the bane of furniture arranging. But there is a way to play up this awkward space to your advantage: divide the room into zones. Arrange the conversation area in one zone and place a desk along the back of the sofa to create a work zone, or place a small table and chairs in the area behind the sofa for homework or playing games.: 
 
 
Achieve fresh style on a budget with these use-anywhere design ideas that are versatile and easy to do.:


I loved the different color combinations, textures and uses of nature inspired fabrics. The room has the same kind of feel I hope to replicate in my bedroom.
 
 
I will be back next week with my plans for the room...


Wednesday, February 5, 2014

Share My Take Two: Design Post Interiors

If you are visiting for the first time, welcome. Feel free to look around and check out my blog where I list small improvements I make in my life in the areas of decorating, organizing and trying new things. Feel free to leave a comment...I love reading them. Or check out the sidebar, to subscribe by email or follow me on Pinterest, if you want to.

Today I am over at Design Post Interiors. I am so excited Beth asked me to participate in her Take Two Series.

Beth is such a talented designer. I love her style, and I am still swooning over the playroom she recently created for one of her clients.


In the Take Two Series, Beth asks about changes that were recently made in home and life.

It was easy to name my favorite change in my home: my bright green dressers I added to my bedroom. Learn more about that project here. And as a bonus, I talk about here how I organized the drawers with a pop of color and pizzazz.


The best change to my life was my goal to organize my house. I show here how I arranged the space under the sink in the bathroom. It's amazing how a little change can make such an improvement. I am now slowly working on the rest of the house. I know where a lot more things are located now than I did a few months ago, but there is still more to do.


The last question was about how you would spend $5. I loved that question, and it really made me think. It reminded me of a gift exchange I attended back near Christmas, where everyone brought a gift that was under $6. I was amazed at how creative everyone was with this, and pleased with all the great items I took home. Check out more about that here.


Be sure to come back tomorrow when I talk about the new addition to my dining room.


Tuesday, January 21, 2014

Learn How to Paint

This weekend I worked on one of the bedrooms in our house. Check out my inspiration here.

This was the plan...


I added just a few new things: duvet cover, curtains, chair, and desk. And shopped my house for the lamp and pillow. Some artwork is still needed, but just a little sprucing up made a big improvement to the room.


It wasn't exactly what I would call a stress free project. But in the end I learned a lot about painting; how to paint wood paneling and how not to paint a metal desk.

Lesson 1:

When the guy at the paint store seems unable to tell you how much paint you need, for the wood paneling on the walls in the bedroom, because his computer program is down, you should not proceed to ask other questions and expect knowledge answers. Hence when said paint store guy insist that the primer plus paint will work great on wood paneling....to not believe him or you will end up with this.


Lesson 2:

When you return to the paint store, do talk to the guy with the 25 years of service badge on his shirt. He will show you the right primer to get, and give very spot-on tips on how to apply it.


Lesson 3:

Even though 25 year guy gave great advice, it will probably not work for you, because you have bad luck. So you have to use two coats of the primer before the paint will stick to the wall, causing great anxiety that you will run out of said primer and have to return to paint store a third time. (For the record, I just made it...if you don't count that spot behind the head board of the bed that no one will ever see because that is now the permanent spot for said bed.

Lesson 4:

After finally finishing the walls in the bedroom, you move on to the desk. The paint job goes great with no problems. Then when the next day you move the desk into the house, from where you painted it in the garage, and barely brush it against the door frame, huge chunks of paint will fall off. You will curse yourself for not using primer, and run outside to spray paint it again. But by this time it is night, the temperature has dropped, and oh yeah it is snowing. The spray paint immediately freezes into a crackle finish on the part you were touching up. Not the look you were going for.

Lesson 5:

So back to paint store (aggghhh) where you purchase primer, sandpaper, and another can of spray paint. You think you are getting smarter now. You are wrong.

Lesson 6:

After a good sanding, the desk is once again ready to be painted. Do not rationalize that the weather is warmer (almost 40) and that is close enough to the temperature that the spray can said is acceptable (50 degrees to 90 degrees). When you add the primer, you get a small crackling effect, but you ignore it thinking the paint will cover it up. Then you add the paint, and it starts to freeze into 3D bubbles all over the whole desk. It looks awful.

Note: I was so upset I forgot to take a picture, but it looked something like this...
 

Lesson 7:

Do not cry...much...over a bad paint job.

Lesson 8:

It does not look as horrible once the paint spreads out a little as it dries. Rationalize that is looks like ice crystalizing. It might even be pretty...maybe. Also, notice that with the addition of the primer, the desk does not chip. Win!

Lesson 9:

Put the desk in the room, and admire how it looks good in the room....if you stand in the doorway....about 5 feet away. Tell yourself that it is good enough for now, and you will just sand it down and start over in April...when it is warmer outside.


Lesson 10:

Learn from this experience. Always sand, prime, then paint...in appropriate weather.

Have you failed at any project lately? Did you learn anything from it?


Friday, January 17, 2014

Spruce Up a Bedroom

I wanted to do a little refresh to one of our bedrooms. I never really loved the duvet cover in the room, so that was first on my list to be replaced. With a quick paint job and some furniture replacement I think the room would look a lot better.

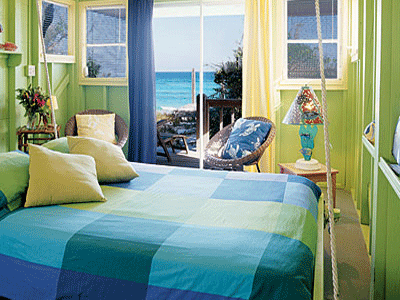
Warm weather with a beachy vibe will be the theme I am going with. The weather outside is dreadful, so this room will be a little bit of summer with an aqua and green color scheme. First I gathered up some inspiration.

Via
 
Via


Via
 
 
I would also like to incorporate some beach photography like pictures by Gray Malin.
 
This is the current plan...


So if you need me this weekend, I will be painting a wall and pretending I am on a bright, colorful tropical beach. I will show you the results on Monday.

Update: Click here to see the room in progress.


Saturday, September 28, 2013

Pin Picks I

Pinterest is so right up my alley. I find inspiration everywhere, and I love that I can keep it organized all in one place. Plus, when I finally get around to doing something, it is easy to find my ideas again.

To share my love of Pinterest I am starting a series, that I am calling Pin Picks.  I plan on posting every Friday.

Here are my recent pins that I picked up from around the web.


Decorate
 
Via
I couldn't find the original source, but the room was designed by David Jimenez

 
Organize

Via


Try Something New


Please check out the rest of my pins by clicking on the Pinterest link on the sidebar.

What is your favorite pin that you found this week?


Tuesday, August 27, 2013

Add More Organization and Pizzazz

I recently painted two dressers for my bedroom, and I put them on either side of my bed so they double as nightstands. Find all of the how-to on a previous post here.


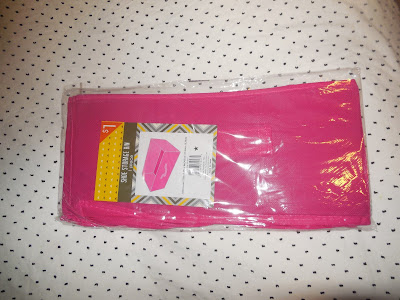
 After using the dresser for a few days, I decided my clothes were still a bit jumbled and could be better divided. I went to Target and found this for $1.


They are actually shoe storage bins.


 I put three across in the drawer of my dresser...


...and placed similar items in each one, such as socks in one bin, and nightgowns in another.


The pink color of the bins is fun and unexpected, and makes me smile every time I open my drawer. I can now quickly find the clothes I want when I get ready in the morning. The extra storage is such an improvement to the bedroom.

Check out the link up at Calling it Home , I Heart Organizing , Tatertots and Jello, Pursuit of Functional Home, Remodelaholic