Showing posts with label dresser. Show all posts

Thursday, June 4, 2015

Love Those Ikea Hacks

Today I am joining Beth of Design POST Interiors for her DIY Summer School. Twice a month this summer she is hosting a link up where other bloggers can share their DIYs. The theme today is IKEA hacks.
 
I love wondering the halls of IKEA (ok more accurately following along with the arrows) and checking out all the model rooms. I always get so much inspiration. And the simple clean lines of the Swedish furniture and other accessories allows for such creativity when it comes to turning them into a hack.
 
Today I am sharing a previous post where I added a little color and some pretty handles to plain Tarva dressers. Check out the post here for all the details.


Via
 

I wanted two dressers, to serve as both a nightstand and storage on either side of the bed in the master bedroom, and these were the perfect fit. With just a little bit of effort, these dressers made a great improvement to the room.
 
Be sure to pop on over to Design Post Interiors and see what IKEA hacks others created.

Tuesday, August 27, 2013

Add More Organization and Pizzazz

I recently painted two dressers for my bedroom, and I put them on either side of my bed so they double as nightstands. Find all of the how-to on a previous post here.


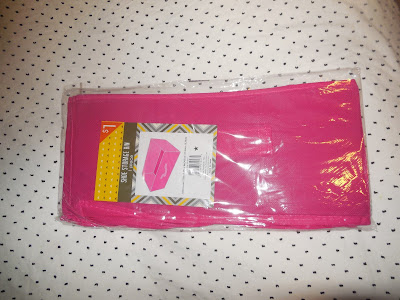
 After using the dresser for a few days, I decided my clothes were still a bit jumbled and could be better divided. I went to Target and found this for $1.


They are actually shoe storage bins.


 I put three across in the drawer of my dresser...


...and placed similar items in each one, such as socks in one bin, and nightgowns in another.


The pink color of the bins is fun and unexpected, and makes me smile every time I open my drawer. I can now quickly find the clothes I want when I get ready in the morning. The extra storage is such an improvement to the bedroom.

Check out the link up at Calling it Home , I Heart Organizing , Tatertots and Jello, Pursuit of Functional Home, Remodelaholic

Wednesday, August 14, 2013

Paint Garage-Sell-Find Lamps

When I was a kid I always liked to do the puzzles on the Sunday comics page of my local newspaper. My favorite was the one that compared two pictures, and you had to pick out the differences. So here is that same kind of puzzle. Can you tell the difference between the two pictures? Keep reading for the answer.

I promised in yesterday's post, about painting the green dressers, that I would give more information about the lamps. A few weeks ago, I just happened to drive by a garage sell in my neighborhood, and I saw two lamps sitting at the end of the driveway.


I bought them for a great price, and then immediately took the lamp shades to a local donation/thrift store. They were not my taste at all, and they were HUGE. I wish now I had taken a picture, but they were this big...


The actual lamps had an interesting shape, and I liked the Greek Key design. The brass finish though was very worn, and needed to be painted over. Following this tutorial, I used this spray paint...


And yes, it was primer. The paint finish on the dressers, that the lamps were going to sit on, was so shiny that I actually wanted a more matte finish on the lamps. The primer delivered that, although it did take two coats of paint and a few touch ups.


I am now a convert to spray paint! It was so fast and easy. Why did I ever use a brush before?

Now did you spot the difference in the two pictures? When I put the first lamp I finished on the dresser, I realized why the original lamp shades were so large. The top part of the lamp was very long and threw off the proportions of a normal-size lampshade.

My husband offered to try to fix it. At first, there was some excited talk from him that he might have to use a sledgehammer. I think he was disappointed when he just had to disconnect the wire off of  the top that holds the light bulb, and pull off the long narrow piece of the lamp.


 I was very impressed with how it looked when he finished. This was such a small change, but it was a great improvement to the lamps.


Check out the Link up at Kammy's Korner.

Photobucket

and Savvy Southern Syle, Thrifty Décor Chick, and East Coast Creative

Sunday, August 11, 2013

Make More Storage in my Bedroom: Dressers as Nightstands

I finally finished a project that I worked on for a couple months now. Actually, I worked on it for a weekend two months ago, then life happened, it sat in my garage for awhile gathering cobwebs, and then I dedicated to dedicate all of this Saturday to getting it done. I am so glad that I carved out the time, because I think it looks great!

This was my inspiration photo. It was in Lonny magazine several months ago. As soon as I saw this picture, I knew it was just the pop of color I needed for my bedroom.


At first I thought I would paint the dresser we already had, but that furniture wasn't really working for us in our bedroom anyway. Our master bedroom is on the small side, and a bit of an odd shape...more long and narrow.  When we moved into our house, we weren't able to fit our second large dresser. As a result, most of our clothes were in a small chest of dresser. I felt like I was constantly shoving things back in just to get the drawers to close. I needed more storage.

Then I saw this picture on another blog, Little Green Notebook, and got an idea. We had a small nightstand beside our bed. I realized if we upsized it to an actual dresser it would be a much better use of the space, provide needed storage, and I would still have a place beside my bed to put my book at night.


Here are a few more inspiration pictures, from other sources, of dressers used as nightstands: 


I did a lot of measuring and a lot of looking. Most of the dressers I found and liked were too big for the small space I was working with. Finally, the Tarva dresser from Ikea was the perfect fit.

I painted it Par Three from Ace Hardware.


I found the drawer pulls on Ebay for about a third of the price of what I was looking at elsewhere.  The person I bought them from also has an Etsy store called Lakeway Candles. They were very helpful and responsive to my order.

So here is the finished dresser.


I moved about half my clothes into the dresser, and it is working out great. There is a matching dresser on the other side of the bed for my husband's things. The extra storage is such an improvement to the bedroom.

I will tell you all more about the lamps in tomorrow's post.....

Also, check out this link up at the blog Serenity Now, Shabby Nest, Tatertots and Jello, and
Not Just a Housewife, and Remodelaholic