Showing posts with label decorate. Show all posts

Thursday, October 8, 2015

One Room Challenge: Fall 2015 ~ Week 1

One Room Challenge Guest Participants, Fall 2015, Week 1
 
 
It's that time again when many of us in blog-land join in with Linda of Calling It Home to take on the challenge of redoing one room in six weeks. I will be popping back in each Thursday with my progress. This is not my first trip to this rodeo (you can see my past ORC rooms by clicking here), but I only decided about 5 minutes ago to throw my hat in the ring again. Our master bedroom needs to get put together, and I know the only way I will stop waffling on what to do and make some decisions is if I have a deadline. The One Room Challenge will definitely give me that.
 
 
I am thinking of keeping the room mostly navy with a touch of green. I was really inspired by this room designed by Lauren Liess.
 
Mistake: The Bowling Alley Effect Long, narrow rooms are the bane of furniture arranging. But there is a way to play up this awkward space to your advantage: divide the room into zones. Arrange the conversation area in one zone and place a desk along the back of the sofa to create a work zone, or place a small table and chairs in the area behind the sofa for homework or playing games.: 
 
 
Achieve fresh style on a budget with these use-anywhere design ideas that are versatile and easy to do.:


I loved the different color combinations, textures and uses of nature inspired fabrics. The room has the same kind of feel I hope to replicate in my bedroom.
 
 
I will be back next week with my plans for the room...


Saturday, May 9, 2015

One Room Challenge: Spring 2015 ~ Week Six

 
It's Reveal Day!!!!
 
 
It is week six of the One Room Challenge Linking Event hosted by Linda of Calling It Home. This time I was a little late getting the room done (so it is technically week six and a half), but good things come to those who wait....
 
 
My entry way is finished, but it was definitely a journey getting to this point. The before pictures I showed in week one are now just a distant memory . I showed my plan for how I would style the space in week two, and asked for help solving my dilemma. In week three, I showed the items that would go into the powder room that is right off the entry way. I also talked about the rug I had picked to use as a runner on the stairs...and then changed  my mind in  week four.  Even though I didn't have a lot of pictures to share that week, I did list the things that I thought every entryway should have. Week five, I showed the progress I had made, so far. Which brings us to week six and what the entry way looks like now...


I am so happy to see this room now every time I open my front door.


The stairs are such an improvement to the space. And I am so glad I picked this rug runner. It has great texture and the right amount of pattern to satisfy my design style, but is still neutral enough to not overpower the room.


I added accessories to the table that was already in the room, including a lamp I had for years. I just put on it a new lamp shade, to update it's look. Two X-benches tuck under the table, but can easily be pulled out and used when putting on shoes. I also included a fern to fill in the space between the table and the stairs.


My favorite thing in the room is the art I added to the wall above the table. I love decorating with maps, and luckily found a great website that had beautiful vintage maps ready to be printed. I selected states that had places that meant something to us as a family. Plus, I added a little heart to each state, because I am corny like that.


The powder room is actually not completely finished. I didn't order enough of the fabric to cover the walls, so there are a few spots that are still bare awaiting the shipment to arrive sometime next week. Putting the fabric on the walls is going well so far.  I do love the bold pattern, something I feel you can get away with in a powder room.


The mirror looks great (although it did take some work getting it on the wall since the studs were not lining up with where I wanted to place the mirror. Actually, my husband figured out how to make it work, because he is smart like that.)


I added some brass accessories that I think ties everything together. The powder room now has the same great style of my inspiration picture.


So that is my entry way and powder room. Having this room put together is such an improvement to my home. I loved participating in the One Room Challenge for the fourth time. The tight deadline and motivation from the other participants helped me get another room in my house finished and looking great. (If you would like to see my other ORC rooms, here are the links to my laundry roommud room, and library/living room.) 
 
Be sure to head on over to Calling It Home to see the other linking participant's room reveals.
 
And keep in touch by either subscribing to all my posts by leaving your email in the box in the sidebar, or following all of my Pinterest boards. And feel free to leave a comment and let me know what you like.
 
Until next time....


Friday, February 6, 2015

Style the Kid's Bathroom


I am slowly trying to take the 80's out of our new house, and recently turned my attention to the kid's bathroom. We are going with yellow and red as the main colors (my kid's favorites) with a painted gray vanity.

This is what I picked out for the accessories. For once my champagne taste didn't get in the way (each item was under $50), and I was able to find affordable items that I think will look great in the space.


Check back next week for my tips on painting a bathroom vanity.


And for more finds under $50 check out Copy Cat Chic.

Wednesday, October 15, 2014

Find a Rug for the Dining Room with Charish

 
Have you all checked out Charish?  It's a great site to find those unique items that are still at a reasonable price. And if you find the perfect thing for your room, and need to make space for it, you can use Charish to sell your no longer needed décor items.When they contacted me to ask if I would like to create a styleboard around one of their rugs, I jumped at the chance. I have been on the hunt for just the right rug for our dining room for some time now. Since our dining room furniture, which came from the house I grew up in, is on the traditional side, I wanted something with a little more modern look to act as a contrast.

Here are a few that that I found on Charish that I considered.

Image of Issac Mizrahi Safavieh Geometric Rug
 
 
Image of Purple Medallion Turkish Rug
 
 
Image of Madeline Weinrib Westley Thunder Cotton Rug
 
Image of Paul Smith Swirl Rug


Such great eye candy, right?! I was so impress with the selection.


But my favorite was this one.

Tulip Green Medallion Turkish Rug
 

I thought it was just the right look I was going for in the dining room. Traditional pattern with a bold modern color. Here is how I see the rug used in the room with the traditional furniture I have and a few blue and white accessories added in.


Now if I can just convince my husband that it is the one, I will be all set. Have you ever checked out Charish? Found anything good?

If you want to check out others just click on the link to see more rugs at Charish.

Thursday, April 10, 2014

One Room Challenge - Spring 2014: Week Two

Wow! This week has flown by...It's now Week Two of the One Room Challenge. Last week I talked about my inspiration for my Mud Room. I have a lot of ideas swirling around in my head. (You can see some of them on my ORC Pinterest Board.) But I knew I had to spend this week getting the structure of the room in place.

First thing to accomplish was adding more storage space to the Mud Room. Like I said in my first ORC post, this room is going to be high on organization, but low on budget. So I did a little looking for shelving that was in my price range. I really wanted to go with this from Ikea since something similar worked so well in my son's bedroom, but the dimensions were off no matter how many times I measured. (Like I thought they would magically change!) After a little more looking, I came across this from Target.

After putting it all together....


I ended up with this....


 In retrospect, I actually like that they have doors I can close and that the shelves are adjustable, something I wouldn't have gotten with the Ikea shelving. Funny how everything works out in the end. I have some thoughts on how to dress up the door fronts a little to make them, well, not look like I bought them for a low price at Target. More on that in the upcoming weeks.

I really liked the window-seat-flanked-by-two-cabinets look, but it made the hats and bags I had stuffed in the storage space under the bench look like an eye-sore.

So here is the part where I reveal, that yes, I have a problem.(Ok, now I feel like I am on Fess Up Friday!  I hoard bags. It is a sickness I tell you.  But you never know when you are going to need a bag and what kind...right??!!! Anyway, I needed to find a better place to hide my shame store my bags.

I grabbed a large bag I had (See there are uses for them!) and thought it would be perfect to store my bag collection in it. First I neatly folded each one. Then I lined them up inside the large bag, so they could be easily pulled out later with out disturbing the other organized bags. I put them into one of the new storage shelves, closed the door and *Poof* problem solved.


I then had this storage space under the bench that needed to be utilized. This took a little bit more thinking, but a few days ago it hit me that this would be a perfect place to solve another one of my problems. My lovely children do not seem to confine themselves to expressing their artistic talent on just paper. Oh no, they love to create 3D art work, that is very hard to store. I had most of it lining the window ledge, but I thought it looked too cluttered. The space under the bench became the perfect place to contain and display their art work. I need to do a little more styling, but this is what I have so far.


So that is where I am now at the end of the second week.
 
Now head on over to Calling It Home and see what everyone else is up to at the Linking Party.
 
Be sure to check back here tomorrow for my round up of my favorite pictures from my fellow linking participants.


And also linking up with Remodelholic, Serenity Now.

Wednesday, April 2, 2014

One Room Challenge - Spring 2014 : Week One

It's One Room Challenge Time!
Last Fall I participate by redoing my Laundry Room with a nod to Dorothy Draper and the Greenbrier.
This year I will be using this picture as my inspiration image.
But I am not redoing a living room. It's the color scheme from this picture  that really drew me in. The use of primary colors is done in such a way that it doesn't look like a crayon box, but much more sophisticated. That is what I hope to replicate for this One Room Challenge when I redo my....

Thursday, March 27, 2014

Fiqure Out How to Use Polyvore

Have you checked out Polyvore yet? It is a site where you can create rooms with out actually lifting any heavy furniture, put together an outfit without trying anything on, or try out the latest beauty must haves without using makeup remover between applications. It is pretty much mood board heaven. And then once you plan everything out, there is information about how much each item costs and where to purchase it. So the ideas can move from the computer screen to real things in your home.

I had so much fun trying it out last week for the first time!

Here is my fantasy Kate Spade Easter Outfit.

Kate Spade Easter Outfit


There are also contests with great prizes for the winners. To enter simple create your set around the given theme. It definitely made me step out of my box and got my creativity flowing. And since it was so easy to do (see comment above about no heavy lifting) I could lean towards  being a bit more over-the-top when designing the room.

Here are two rooms I created for The Pink Pagoda's Art Filled and Feminine Contest.

Art Filled Feminine Office at Improvement List

Link to Polyvore for Source List

"Art Filled and Feminine at Improvement List" by improvementlist on Polyvore
Link to Polyvore for Source List


So are you ready to create your own sets? Here is a quick tutorial just to get you started.
 
 
1. Go to Polyvore
 
2. Create an account.
 
3. At the top of the screen, click the word Create, and from the drop down menu select Set.
 
4. On the right side of the screen you can type in keywords to find the item you want to add.
 
5. Once you find what you are looking for, drag the item on to the Collage.
 
6. It you want to change the size, simply click on the edge of the image and move it to adjust.
 
7. Repeat steps 4-6 until the set looks just right.
 
8. Click Publish in the upper left hand corner. You are done!
 
Once you get the basics down you can move on to cloning, flipping and further adjusting the placement of the image. Also, you can remove the background or  custom crop it. There are templates and other effects that can be added.
 
There is  a tool called the Clipper which sounds great. Apparently, if you find a picture of an item elsewhere, you can use this tool to add it to your account to use in your sets. I just can't seem to get it to work for me so far. (I am sure it is error on my part!) Let me know if you have tried it out.
 
If you are a newbie like me and join Polyvore, or you are an old hat who has been creating sets for years, be sure to follow me  on Polyvore by clicking here. I will follow back. I can't wait to see what everyone puts together.
 
So what to do you think about Polyvore?


Monday, March 3, 2014

Paint a Porch Ceiling Blue

 
Many years ago my husband and I spent a vacation in the Florida Keys.  While walking around the town of Key West, I was enamored with the white front porches with ceilings painted pale blue.


We asked one of the locals about the  trend, and were told it was to keep away haints (another term for restless ghosts.) Apparently, this color was suppose to protect the occupants of the house from evil sprits entering the home. We laughed thinking that this was a story made up to scare tourist. Later, we found out that this was a tradition through other parts of the south, and people even refer to this soft  blue green shade as Haint Blue.


I did a little research  and discovered that there was also a practical side to this blue. Apparently, since it is almost the same shade as the sky, insects and spiders are fooled by it and do not build their nest or webs in the top of the porch. That would be one way to repel the bugs while sitting on the porch swing sipping your sweet tea on a hot summer day.

Would you like to paint your porch ceiling blue?

 
blue porch ceiling


Today I am participating in the Blue and White Bash hosted by The Pink Pagoda. Be sure to head on over there to see more color inspiration.

Wednesday, February 26, 2014

One Room Challenge with Calling it Home: Now

So excited that Linda at Calling it Home decided to do an update to the One Room Challenge.

For those of you who are recent visitors to this blog, One Room Challenge involves putting together a room in 6 weeks. It was so much fun for me to participate in this back in the fall.

Week One was the before. This room so needed help.


I decided to put together a room inspired by the Greenbrier Resort. I always loved the interior design created by Dorothy Draper, and wanted to bring a little of that pink and green look into my house.


 The room re-do started with retiling the floors in Week Two.


For Week Three, I shared how I created my own fabric for the curtains.


The most commented on part of the laundry room was reveled in Week Four when I used green tape to create a wall treatment.


In Week Five I showed off all the items I was going to use to organize the space.


Week Six was the big reveal. I was so excited to be done!


Now for what the Laundry Room looks like as of yesterday....

Thursday, February 20, 2014

Find an Idea for a Unique Kitchen Backsplash

 
I loved the kitchen featured in the March edition of House Beautiful. Those shutters are such a great pop of blue, and the island works well for the small space. But what really caught my eye was the back splash behind the sink and cook top.
 
 
lee jofa lauretta fabric backsplash
 
 
At first I thought it was some kind of hand painted tile. But after I read the article, I realized it was fabric laminated between two piece of glass. Fabric as a backsplash! What a great way to incorporate more color and pattern into the space. This idea would be an improvement to any kitchen.  Imagine the possibilities!
 
 
So what do you all think? Would you try this in your house?


Wednesday, February 19, 2014

Share a Great Find: Copy Cat Chic

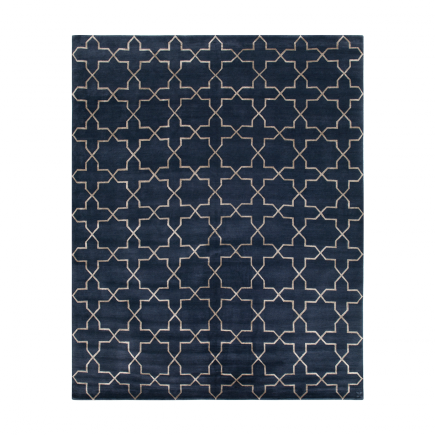
Madeline Weinrib Westley Tibetan Carpet
This rug had me at BLUE.

But the price!!! Let's just say it wasn't going to happen. After a little research, I came across one that I think looks just as great, but much more affordable. Do you want to see it?

Then head on over to Copy Cat Chic. Once again Reichel is featuring one of my low cost finds. Be sure to check it out. The similarity is amazing.

If you are here for the first time, feel free to look around. I list ideas on how to make small improvements in your life from organizing a laundry room to decorating a bookcase. And I love it if you want to leave a comment and introduce yourself. Comments make my day! Also, check out my Pinterest boards for more inspiration, or sign up in the sidebar to get my blog delivered right to your inbox.

Monday, February 3, 2014

Collect Blue and White Art

Vincent van Gogh. The Starry Night. Saint Rémy, June 1889


The first art I ever acquired was a poster of Starry Night complete with Von Gogh in big block letters on the bottom. I put it on my college dorm room wall with poster putty. I thought I was being so sophisticated by picking a masterpiece to display in my space.

A few year later, after purchasing our first house, I found my next art piece. It was a reproduction of a vintage poster advertising French wine.  I think I bought it at Bed, Bath and Beyond. The color scheme of the piece started my temporary, but deep, obsession with the color scheme green, yellow and red. I happily decorated the bedroom in these colors to complement this art hanging prominently on the wall. (This time it was in a frame, and attached to the wall by hanging on a nail...see, I was moving up in the world.)

While these early pieces of artwork still have a fondness in my heart, as I moved towards my thirties, I decided I needed to have "real" art work. I wanted to purchase art that was created by someone, and not a mass-produced reproduction. It almost felt like this would show I was moving to a new stage in my life...at least a new house decorating stage.

About the time I made this decision, I happened to be volunteering at an art fair. I walked by a booth, and I swear a beam of light shone on one of the pictures, directing me to look at it. (Ok, I am exaggerating, but I was really taken with the piece.) The artist told me how she took a Polaroid picture, and before it completely dried, swirled the image around with a stick pen. I had luckily stuck a twenty dollar bill in my pocket that morning, and that bought me the smallest print she had.


My next big art purchase was from an artist I found on Ebay. (I know still not such an adult that I would actually go into a gallery.) The painting he had listed reminded me of what the forest near my childhood home looks like in that early morning time just before the sun rises. Once again I fell hard. I needed it in a bigger size than what was listed to fit the space in my living room. After an email exchange, the artist agreed to custom make something for a price that was almost the same price as the couch that would be beneath it. As someone who just a few years before, thought that decorating with a poster was high times, the cost was a bit of a struggle for me to come to terms with. But after thinking about it for a while, I finally commissioned the painting. I am so glad I did. The painting still makes me feel calm and happy whenever I look at it, all these years (and a new house) later.


Fast forward a few years, and we have now moved a few times since I decided to work on my small art collection. Our new home needed something for the back wall of our dining area. I asked my dad, a professional photographer, if I could have some of his pictures to display.  I waited a few months, after all the paying customers come first, but finally pictures of flowers arrived. I love that my dad autographed them, and they look great in the room. And of course I was glad that blue and while flowers where included.


I continue to look for art that speaks to me. I wonder when my next find will appear!


Do you have a favorite piece of art in your home? How did you come across it?

Do you notice how I subconsciously gravitate to the color blue? Do you have a certain color that catches your eye?


If you want to see more ways to use that color, be sure to head on over to The Pink Pagoda and the Blue and White Bash. Also, be sure to check out Jennifer's Etsy store. She has beautiful prints that would look great in any room.

And for more blue and white eye candy, see what I collected on my Blue and White Pinterest Board.


Also linking up with the Remodelaholic and Serenity Now