Wednesday, April 30, 2014

Make Preppy Storage Boxes for the Mud Room

I needed boxes to put in the storage cubby unit that is in my mudroom. I looked at the typical cloth bins that are normally used. While they were okay, but  I wanted to keep the costs as low as possible. Plus I needed to add a little more style that the plain colored bins just weren't giving me.

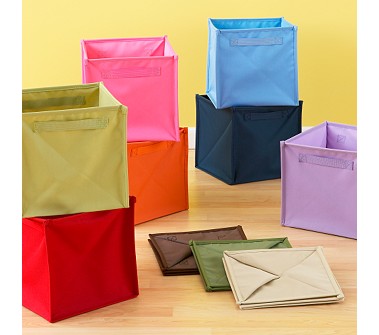
canvas bins from landofnod Containers That Conquer Clutter
 I just could not find what I was looking for, so I decided to make them instead.
First, I got some boxes from my work that were going to be thrown away.
Next, up was gathering my supplies: Wrapping paper, Duct tape, and scissors.  What more do you need?

I covered each box with the wrapping paper and then I eyeballed the placement of  the Duct tape.
To make them all look similar, I did the totally unscientific method of putting a completed box beside the one I was working on, and lining up the tape.

 A couple hours, and 9 boxes later, I ended up with this.


Just the kind of preppy look I was going for. Plus there was now the addition of a lot of needed storage. Overall, it was a great improvement to the space.

Check out other high end inspiration recreated on a budget over at I Heart Organized High Low Monthly Organizing Challenge

And stop back next Thursday when I reveal the finished mudroom for the One Room Challenge.
Linking Up:
Remodelaholic


Thursday, April 24, 2014

One Room Challenge - Spring 2014: Week Four

With Spring Break and the holidays this past week, I feel a little behind with my mud room. I had such ideas and plans when I was putting together my ORC Pinterest Board. But I am halfway through now, and I realize I need to get cracking if I want to get all the details of the room in place before the end of the One Room Challenge.

I have gotten the big things done, such as finding the direction the room will go in Week One.  Also, I added storage shelves in Week Two. Making pretty box to help further organize the space were done in Week Three

Now it is time to think about accessorizing. First thing I need to do is make a decision on the rug. I know I want the color to be yellow. Plus it has to stand up to heavy traffic.

Here are the ones I am considering:

 
Rugs USA Tuscan Moroccan Trellis Flatwoven Yellow Rug


Oh decisions, decisions...Which do you all like best?
 
 
Be sure to head on over to Calling It Home today to check out the other linking participants. And I will be back tomorrow with my favorite pics to pin from those participating in the ORC.

Thursday, April 17, 2014

One Room Challenge-Sping 2014: Week Three

So it is now Week Three of the One Room Challenge! Here we go....
 
I got a little done in the area of organization. I wanted storage boxes for the navy shelf in the mudroom. After looking around, I decided that most of the options were just a little too plain. Not finding the perfect thing, I decided to just make them.
 
This was my first attempt. I hated it...


It looked like I just wrapped a bunch of duct tape around a box...which is what I did, but the goal was to look like a classy DIY, not a dumpy box with wrinkled tape lines all over it.
 
So it was time to try, try again...
 
Next up was this...


This was more what I was going for with the look of these storage boxes. Such an improvement. Now just 8 more to make. I will post soon with a tutorial.

Be sure to check out my fellow link participants over at Calling It Home.
 
And if you celebrate it, Happy Easter and/or Passover!

Friday, April 11, 2014

Pin Picks X

I hope everyone had a chance to stop by Calling It Home and check out week two of the One Room Challenge.

Here are a few of my favorites for this week. I included them on the One Room Challenge Linking Party Pinterest Board.


Thursday, April 10, 2014

One Room Challenge - Spring 2014: Week Two

Wow! This week has flown by...It's now Week Two of the One Room Challenge. Last week I talked about my inspiration for my Mud Room. I have a lot of ideas swirling around in my head. (You can see some of them on my ORC Pinterest Board.) But I knew I had to spend this week getting the structure of the room in place.

First thing to accomplish was adding more storage space to the Mud Room. Like I said in my first ORC post, this room is going to be high on organization, but low on budget. So I did a little looking for shelving that was in my price range. I really wanted to go with this from Ikea since something similar worked so well in my son's bedroom, but the dimensions were off no matter how many times I measured. (Like I thought they would magically change!) After a little more looking, I came across this from Target.

After putting it all together....


I ended up with this....


 In retrospect, I actually like that they have doors I can close and that the shelves are adjustable, something I wouldn't have gotten with the Ikea shelving. Funny how everything works out in the end. I have some thoughts on how to dress up the door fronts a little to make them, well, not look like I bought them for a low price at Target. More on that in the upcoming weeks.

I really liked the window-seat-flanked-by-two-cabinets look, but it made the hats and bags I had stuffed in the storage space under the bench look like an eye-sore.

So here is the part where I reveal, that yes, I have a problem.(Ok, now I feel like I am on Fess Up Friday!  I hoard bags. It is a sickness I tell you.  But you never know when you are going to need a bag and what kind...right??!!! Anyway, I needed to find a better place to hide my shame store my bags.

I grabbed a large bag I had (See there are uses for them!) and thought it would be perfect to store my bag collection in it. First I neatly folded each one. Then I lined them up inside the large bag, so they could be easily pulled out later with out disturbing the other organized bags. I put them into one of the new storage shelves, closed the door and *Poof* problem solved.


I then had this storage space under the bench that needed to be utilized. This took a little bit more thinking, but a few days ago it hit me that this would be a perfect place to solve another one of my problems. My lovely children do not seem to confine themselves to expressing their artistic talent on just paper. Oh no, they love to create 3D art work, that is very hard to store. I had most of it lining the window ledge, but I thought it looked too cluttered. The space under the bench became the perfect place to contain and display their art work. I need to do a little more styling, but this is what I have so far.


So that is where I am now at the end of the second week.
 
Now head on over to Calling It Home and see what everyone else is up to at the Linking Party.
 
Be sure to check back here tomorrow for my round up of my favorite pictures from my fellow linking participants.


And also linking up with Remodelholic, Serenity Now.

Monday, April 7, 2014

Make Pink Hydrangeas Blue But Not White

We just got back from a wonderful Spring Break Trip. More on that later this week. We are still a little discombobulated around here, but I wanted to take a quick moment to join the Pink Pagoda for the Blue and White Bash.

It is finally starting to look like Spring around here, so my first thought when deciding what to talk about this month was that I knew it had to involve flowers since, well, I haven't seen any growing from the ground in several months. Then, I thought about one of my favorite flowers, hydrangeas, which can be both blue and white. Perfect!

I had heard that you could change the color of this flower by somehow treating the soil. I wasn't sure if that was just an old wives' tale, so I did a little research. Apparently, if you make the soil acidic you can change the hydrangea's petals from pink to blue.(This website has the recipe if you ever want to try it out in your garden.) But the white hydrangea remains that color no matter what.

Before we left on our trip. I made a quick stop at my favorite place to place to purchase flowers...our local grocery store. Four dollars later, I had these white hydrangeas blooms to put in a blue planter in our living room. Since this is actually made for potted plants, and there is a hole in the bottom of this container, I added a smaller, clear vase to tuck inside and hold the water for the flowers.


It was a great improvement to the décor of the room. The perfect blue and white to welcome spring into my home.

Linking up with Remodelholic

Friday, April 4, 2014

Pin Picks IX

Did you check out Calling It Home yesterday.? All of the link up participants showed off the ideas for their rooms. I can't wait to see what everyone does over the next 6 weeks! Each Friday, I will feature a few rooms as part of my Pin Picks Series.  Today, though, I am spending time with  the family because it is my kid's Spring Break. So in the interest of time, I am sharing the link to the One Room Challenge Linking Party Pinterest Board. Be sure to check out all the talent from both this and past ORC's. I will be back to my regularly scheduled program on Monday.

Wednesday, April 2, 2014

One Room Challenge - Spring 2014 : Week One

It's One Room Challenge Time!
Last Fall I participate by redoing my Laundry Room with a nod to Dorothy Draper and the Greenbrier.
This year I will be using this picture as my inspiration image.
But I am not redoing a living room. It's the color scheme from this picture  that really drew me in. The use of primary colors is done in such a way that it doesn't look like a crayon box, but much more sophisticated. That is what I hope to replicate for this One Room Challenge when I redo my....

Tuesday, April 1, 2014

Tip of the Day:Clean a Mirror

Since I am working on getting ready for Thursday's One Room Challenge, I thought I would just share a quick tip today.


+
 
 
newspaper
 
=
 
A Streak Free Shine
 
 
I heard this tip before, but wasn't sure if it would really work. I mean wouldn't it be logical to think that the black news print would just smear all over the glass. On Sunday, I happen to be in my bathroom, with a newspaper in my hand, looking at my dirty mirror. I thought what the heck, might as well try it, and swiped the newspaper over the mirror. I was amazed. It made the mirror look even better than when I use glass cleaner. Literally there was little flecks of light pinging off of it when I was done.


Have you ever tried this before?


Link up with A Bowl Full of Lemons